
7 Jupyter Notebook Tips and Tricks
Jupyter Notebooks are widely used for munging data and presenting the findings. They’re quite easy to start using and do not require much setup. If you’re using Anaconda distribution, it comes with Jupyter notebooks. I won’t be talking about installing Jupyter, and I’m going to assume you’ve seen it before. If not, it’s not very tricky to learn the basics, really. What I’m going to share with you instead, is a number of tips and tricks that can make your life a little easier when working with notebooks.
Number 0: Beware of the hidden state
Being very flexible, Jupyter notebooks let you run your cells, edit them, remove them, add new ones,
and do all those things out of order. This freedom comes with a price, because the order in which
you execute your cells actually matters when some cells rely on the execution of the others.
And this is the case most of the time. Rare cells exist completely independent of the others,
at least in my experience.
Executing cells out of order can produce confusing results - check out some examples
Joel Grus gives in his talk “I don’t like Notebooks”.
What’s the cure? Well, there’s no “one-suits-all”. You can, like Joel Grus, not use notebooks.
You can use %history magic to examine past input and its order. Or you can re-run all cells from
top to bottom to restore the logical flow of what you were trying to do. One important thing though is
to always be aware of the hidden state.
Number 1: Long Outputs
Every once in a while the output of a cell gets way too long and blows up the whole notebook. You can click on the left panel next to it to turn it into a scrollable window, or double-click to collapse it.
Number 2: Shortcuts for running cells
Please tell me you’re not using your mouse or trackpad to run cells:) That’d be such a waste of time! Most of the time I hit Shift + Enter to run a cell, but at some point I’ve discovered one more way to run a cell, which occasionally is more convenient: Alt+Enter runs current cell and creates a new one below it.
Number 3: Command mode vs Edit mode
One thing that struck me as unusual at first is that notebooks have two keyboard modes: Command mode and Edit mode. Basically, when you’re editing a cell, you’re in the Edit mode and shortcuts for that mode apply. If you’re operating with cells (e.g. adding new ones), then you’re using shortcuts from the Command mode. A tiny color margin on the left side of a cell indicates what mode you’re in - green for Edit, blue for Command. You can switch between them by hitting Esc to go to Command mode (I think of it as of “escaping out of a cell”), and Enter (“entering back into the cell”) There’s a number of useful things that you can do when you’re in the Command mode:
- Select multiple cells: Shift+Up/Down to extend the selection up or down
- Merge cells: Shift + M
- Copy/paste selected cells: C/V
- Cut a cell: X
- Add a cell above/below current cell: A/B
- Look up other shortcuts: H
Number 4: Looking up docs
One way of looking up docstrings in Jupyter notebooks is to use ? character right after the object
you just typed in a cell and then running the cell. But I personally prefer using Shift + Tab
shortcut which gives the same result but doesn’t require running a cell. You can hit it several times
to get an extended version of the documentation.

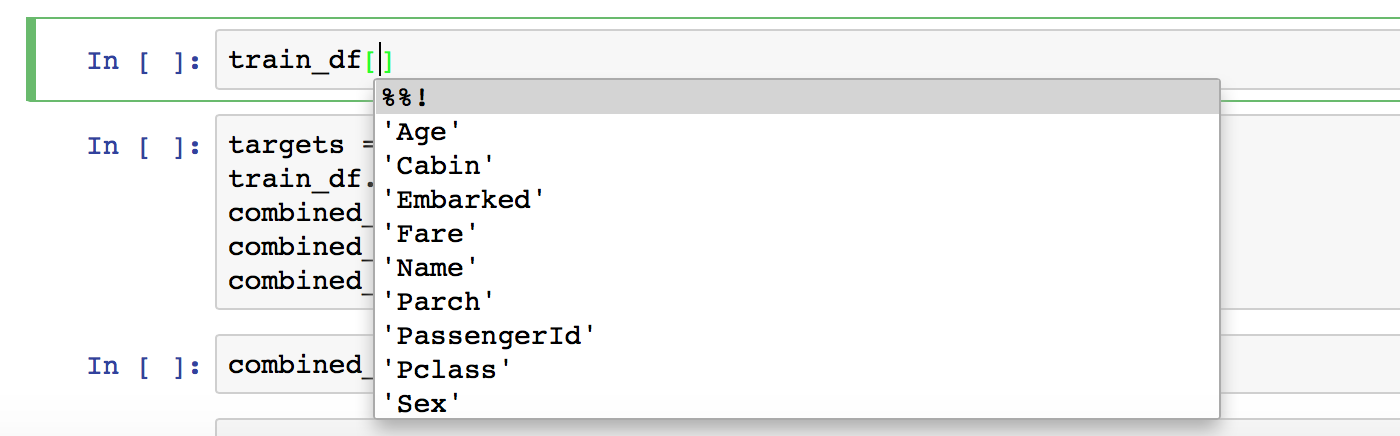
Number 5: Tab completion
If you want to see a list of all available attributes of an object, you can type the name of the object, then a period (.) and hit Tab. That’s nice, but what I find even more useful is that Tab completion can help you out even with the column names of your Data Frame:
Number 6: IPython Magic
Being built on top of IPython, Jupyter gives you access to all of the IPython magic commands. You can learn about all available magic commands in IPython docs. Here I’ll only list my favourites.
- Running external code:
%run myscript.py - Timing code execution:
%timeit - Quickly lookup available magic commands:
%magic - See a batch of previous inputs at once:
%history
Number 7: High-resolution plots on Retina
I have only recently discovered this one, and at the moment it’s bringing me so much joy! Finally, I can get high resolution plots in my notebooks instead of blurred regular outputs. Here’s what a regular plot looks like for me:
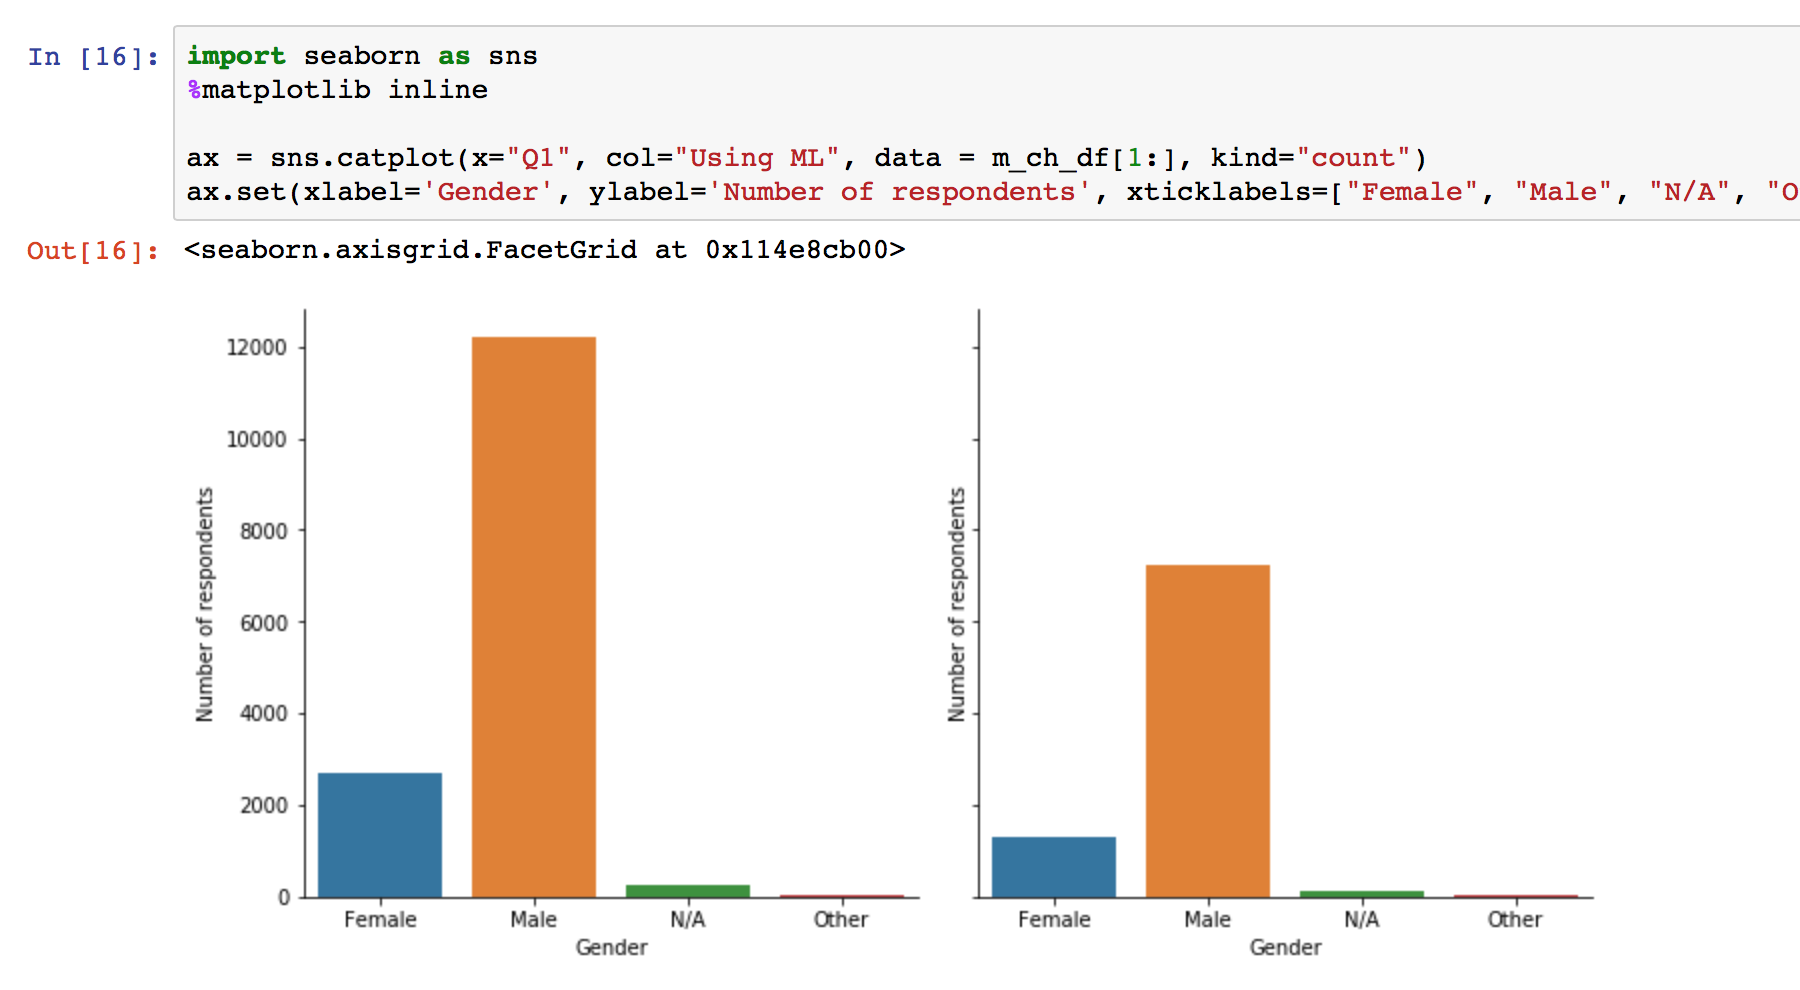
Now, let’s add some magic: %config InlineBackend.figure_format = 'retina'

Looking sharp! :)
That’s it for now! Hope you found something useful here. I’ll be updating this post with new tricks as I discover them.